
Key Takeaways
- Schedule the 11-month warranty inspection around month ten so you have time to send a written claim before first-year coverage ends.
- New York's housing merchant implied warranty law gives many new homes tiered protection, commonly one year for workmanship, two for major systems, and six for material structural defects.
- Many builders substitute a limited warranty with its own performance standards, exclusions, and claim procedures, so read the full document.
- A thorough inspection covers drainage, roof, attic, foundation, mechanical systems, interior finishes, windows, and doors after the first New York winter.
- Submit every claim in writing with locations and photos, keep proof of delivery, and let the builder inspect before you repair.
- Verify any inspector's active New York license with the Department of State; NACHI membership is voluntary and is not a license.
An 11-month warranty inspection is a full, independent inspection of a newly built home, scheduled shortly before the builder's first-year coverage ends. Its purpose is simple: find and document defects while the builder is still obligated to fix them. This guide explains how New York's tiered new-home warranty works, exactly what an inspector checks in a one-year-old house, how to schedule around your deadline, and how to turn the report into a clear, well-documented written claim.
It is written for owners of new single-family homes, townhouses, and low-rise condominiums across New York, from subdivisions in Saratoga and Orange counties to new builds on Long Island and in the suburbs of Buffalo and Rochester. If you closed on new construction within the past nine or ten months, now is the right time to read it.
New York matters here for two reasons. First, state law gives buyers of many new homes a statutory implied warranty with separate one-, two-, and six-year tiers, which shapes what you can claim and when. Second, a home's first New York winter is a genuine stress test: frost, freeze-thaw cycles, snow loads, and a full heating season expose problems that were invisible at a summer closing.
In this guide
- What Is an 11-Month Warranty Inspection?
- Why Month 11 Is the Right Time
- How New York's New-Home Warranty Tiers Work
- What Builder Warranties Typically Exclude
- Exterior, Roof, and Drainage Checks
- Attic, Foundation, and Structural Checks
- HVAC, Plumbing, and Electrical Checks
- Interior Finishes, Windows, and Doors
- How New York's First Winter Tests a New Home
- Your New Construction Warranty Timeline at a Glance
- Choosing an Inspector, Cost Factors, and How to Prepare
- Turning Your Report Into a Written Warranty Claim
- After the Repairs: Verification and the Two-Year Systems Tier
- How Inspecverse Can Help You Find a Local Warranty Inspector
- Frequently Asked Questions
What Is an 11-Month Warranty Inspection?
An 11-month warranty inspection is a top-to-bottom evaluation of a newly built home performed before the end of the builder's first-year coverage period. In scope it looks much like a standard pre-purchase inspection: the inspector examines the roof, exterior, structure, attic, basement or crawlspace, heating and cooling, plumbing, electrical system, interior finishes, windows, and doors. The difference is purpose. You already own the house, so the question is not "should I buy it?" but "what has gone wrong, or started to go wrong, that the builder is still responsible for?"
That shift changes how a good report is written. Instead of general advice for a buyer, the report becomes evidence: each finding is located, photographed, and described precisely enough that the builder's warranty department cannot misunderstand it.
Who performs it
In New York, anyone performing home inspections for compensation must be licensed under Article 12-B of the Real Property Law by the Department of State's Division of Licensing Services. Because your home has now been lived in, an 11-month review of a one-to-four-family house falls within the work that license covers. Many inspectors also belong to associations such as NACHI. Membership is a voluntary credential that can signal training, but it is not the same as an active state license, so check both.
What it is not
- It is not a municipal code inspection.
- It is not the builder's own customer care walkthrough, which is performed by the party responsible for repairs.
- It is not a guarantee that nothing else will surface later. It is a documented snapshot taken at a strategically useful moment.
Why Month 11 Is the Right Time
The timing balances two competing needs: giving problems enough time to appear, and leaving enough time to act before coverage ends.
Enough time for problems to show
A new house changes a great deal in its first year. Framing lumber dries and shrinks through the first heating season, which is why drywall nail pops, small corner cracks, and gaps at trim joints often appear months after closing. Concrete continues to cure and can develop shrinkage cracks. Backfill around the foundation settles as it absorbs rain and snowmelt. Windows and doors face their first full cycle of humidity swings. Very few of these issues are visible at a final walkthrough, but by month eleven many homes have revealed them.
Enough time to act
First-year coverage runs from a defined start date, often the date title passed to you or the date you first occupied the home, whichever came first. Check your contract for the exact definition. If you inspect in the last week, you may not be able to receive the report, review it, and get written notice to the builder before the clock runs out. Inspecting between month ten and the start of month eleven leaves room to:
- find an available inspector during a busy season;
- receive the written report, which New York rules require within five business days and which many inspectors deliver within a day or two;
- organize the findings into a written claim; and
- confirm the builder actually received it.
Why not wait for problems to appear?
Many defects never announce themselves: a bath fan venting into the attic, a missing kick-out flashing, a disconnected duct, or grading that sends water toward the foundation. These are exactly what a one-year warranty inspection finds and an owner misses, and they are far easier to raise now than in year three.
How New York's New-Home Warranty Tiers Work
Many buyers assume the builder's booklet is their only protection. In New York, that is often not the whole picture. Article 36-B of the General Business Law (sections 777 to 777-b) creates a housing merchant implied warranty for many newly built homes sold by a builder. This is a separate statute from the Real Property Law article that licenses home inspectors. Its protections are commonly summarized in three tiers:
- One year: the home is free from defects caused by a failure to construct it in a skillful manner.
- Two years: the plumbing, electrical, heating, cooling, and ventilation systems are free from defects caused by a failure to install them in a skillful manner.
- Six years: the home is free from material defects, meaning serious damage to load-bearing elements such as the foundation, framing, beams, or roof framing that makes the home unsafe, unsanitary, or otherwise unlivable.
Limited warranties can replace the implied warranty
The statute allows a builder to exclude or modify the implied warranty if it offers a written limited warranty that meets the law's minimum standards. That is why many New York builders provide a booklet with its own definitions, construction performance standards, and claim procedures. Those standards matter: a limited warranty often defines how wide a crack must be, or how much a floor may deflect, before an item counts as a defect.
Notice is everything
Both the statute and typical limited warranties require written notice of a claim, with deadlines tied to the end of the relevant warranty period, and the builder generally must have a reasonable opportunity to inspect and repair. Never rely on a phone call or an informal grace period.
Confirm how it applies to you
The statute has its own definitions of which homes and transactions it covers, and every builder's limited warranty differs. If a significant claim is at stake, a New York real estate or construction attorney can confirm which protections apply. This guide explains the framework; it is not legal advice.
What Builder Warranties Typically Exclude
Knowing what your warranty does not cover keeps your claim focused and credible. Exact terms depend on your document, but these exclusions appear in many New York new-home warranties:
- Normal wear and tear, and minor variation within the warranty's stated tolerances.
- Damage caused by owner neglect, misuse, or skipped routine maintenance.
- Problems resulting from changes you made, such as a finished basement, a new deck, or regraded landscaping.
- Appliances and equipment covered by separate manufacturer warranties, which the builder may simply pass along to you.
- Site items such as driveways, walkways, fences, and landscaping.
- Consequential damage, such as belongings ruined by a leak, which some warranties limit.
- Items noted and accepted at the final walkthrough, depending on the warranty's wording.
Maintenance that can affect coverage
Builders frequently respond to claims by pointing to maintenance the homeowner was supposed to perform. Keep records showing you replaced HVAC filters, kept gutters and downspouts clear, maintained caulk and grout as the homeowner manual directed, ran bath fans, and left the grading around the foundation alone. An owner who can show reasonable maintenance is in a much stronger position.
Why the inspector's distinctions matter
A strong report labels each finding clearly. A missing roof flashing or reversed hot and cold supply lines is a construction issue. A dirty furnace filter or a clogged gutter is maintenance. Mixing the two in a claim invites the builder to dismiss the whole list. Ask your inspector to note when a condition appears to stem from original construction and to describe conditions factually when the cause is unclear.
Exterior, Roof, and Drainage Checks

The exterior is where a one-year-old home most often begins to let water in, and water drives many of the most expensive warranty claims. A thorough inspector works around the entire house.
Grading and drainage
- Soil that has settled near the foundation and now slopes toward the house.
- Downspouts that discharge against the foundation, have come apart, or lack extensions.
- Low spots where water ponds after rain or snowmelt.
- Window wells that collect water or lack drains or covers.
Roof and gutters
Depending on the roof and the inspector's methods, the roof may be examined from the surface, a ladder, or the ground. The inspector looks for lifted, missing, or creased shingles after the first wind and snow season; exposed or backed-out nails; flashing at chimneys, walls, skylights, and plumbing vents; missing kick-out flashing where a roof edge meets a sidewall; and gutters that pitch the wrong way or pull loose.
Walls, decks, and penetrations
- Siding gaps, buckled vinyl, open joints, and failed sealant at windows and doors.
- Gaps around hose bibs, dryer vents, meters, and exhaust penetrations.
- Deck ledger attachment, flashing, and railing stability where the builder installed the deck.
- Cracked or heaved stoops and steps.
Prioritize exterior findings in your claim. A small grading or flashing error today can become a wet basement or rotted sheathing later, when coverage has ended and proving the original cause is harder.
Attic, Foundation, and Structural Checks

Some of the most valuable findings come from spaces owners rarely enter.
Attic
- Insulation that is missing, compressed, or uneven, often near the hatch or eaves.
- Bathroom or kitchen exhaust ducts that end in the attic instead of outdoors, or have come apart.
- Blocked soffit vents or baffles, which reduce ventilation and contribute to ice dams.
- Frost, condensation stains, or early mold on roof sheathing, a sign of warm air leaking from the living space.
- Damaged trusses, missing hangers, or framing cut by other trades.
Foundation, basement, and crawlspace
Hairline vertical shrinkage cracks in poured concrete are common in the first year and are not automatically structural. The inspector looks for patterns that deserve more attention: cracks that are wide, horizontal, stepped in block walls, offset on one side, or leaking. Other checks include damp spots and efflorescence, water at the slab edge, sump pump operation and discharge location, missing vapor retarder in crawlspaces, and condensation on ducts or pipes.
Floors, framing, and the garage
- Floors that bounce, slope, or squeak excessively.
- Ceiling-to-wall cracks that open in winter, which can indicate truss uplift, a seasonal effect common in cold climates.
- Garage slab cracks and the condition of the door between the garage and the house.
If the inspector sees signs that a load-bearing element is not performing as it should, the usual next step is an evaluation by a structural engineer. Serious structural problems may fall under a longer warranty tier, but documenting them now strengthens any future claim.
HVAC, Plumbing, and Electrical Checks
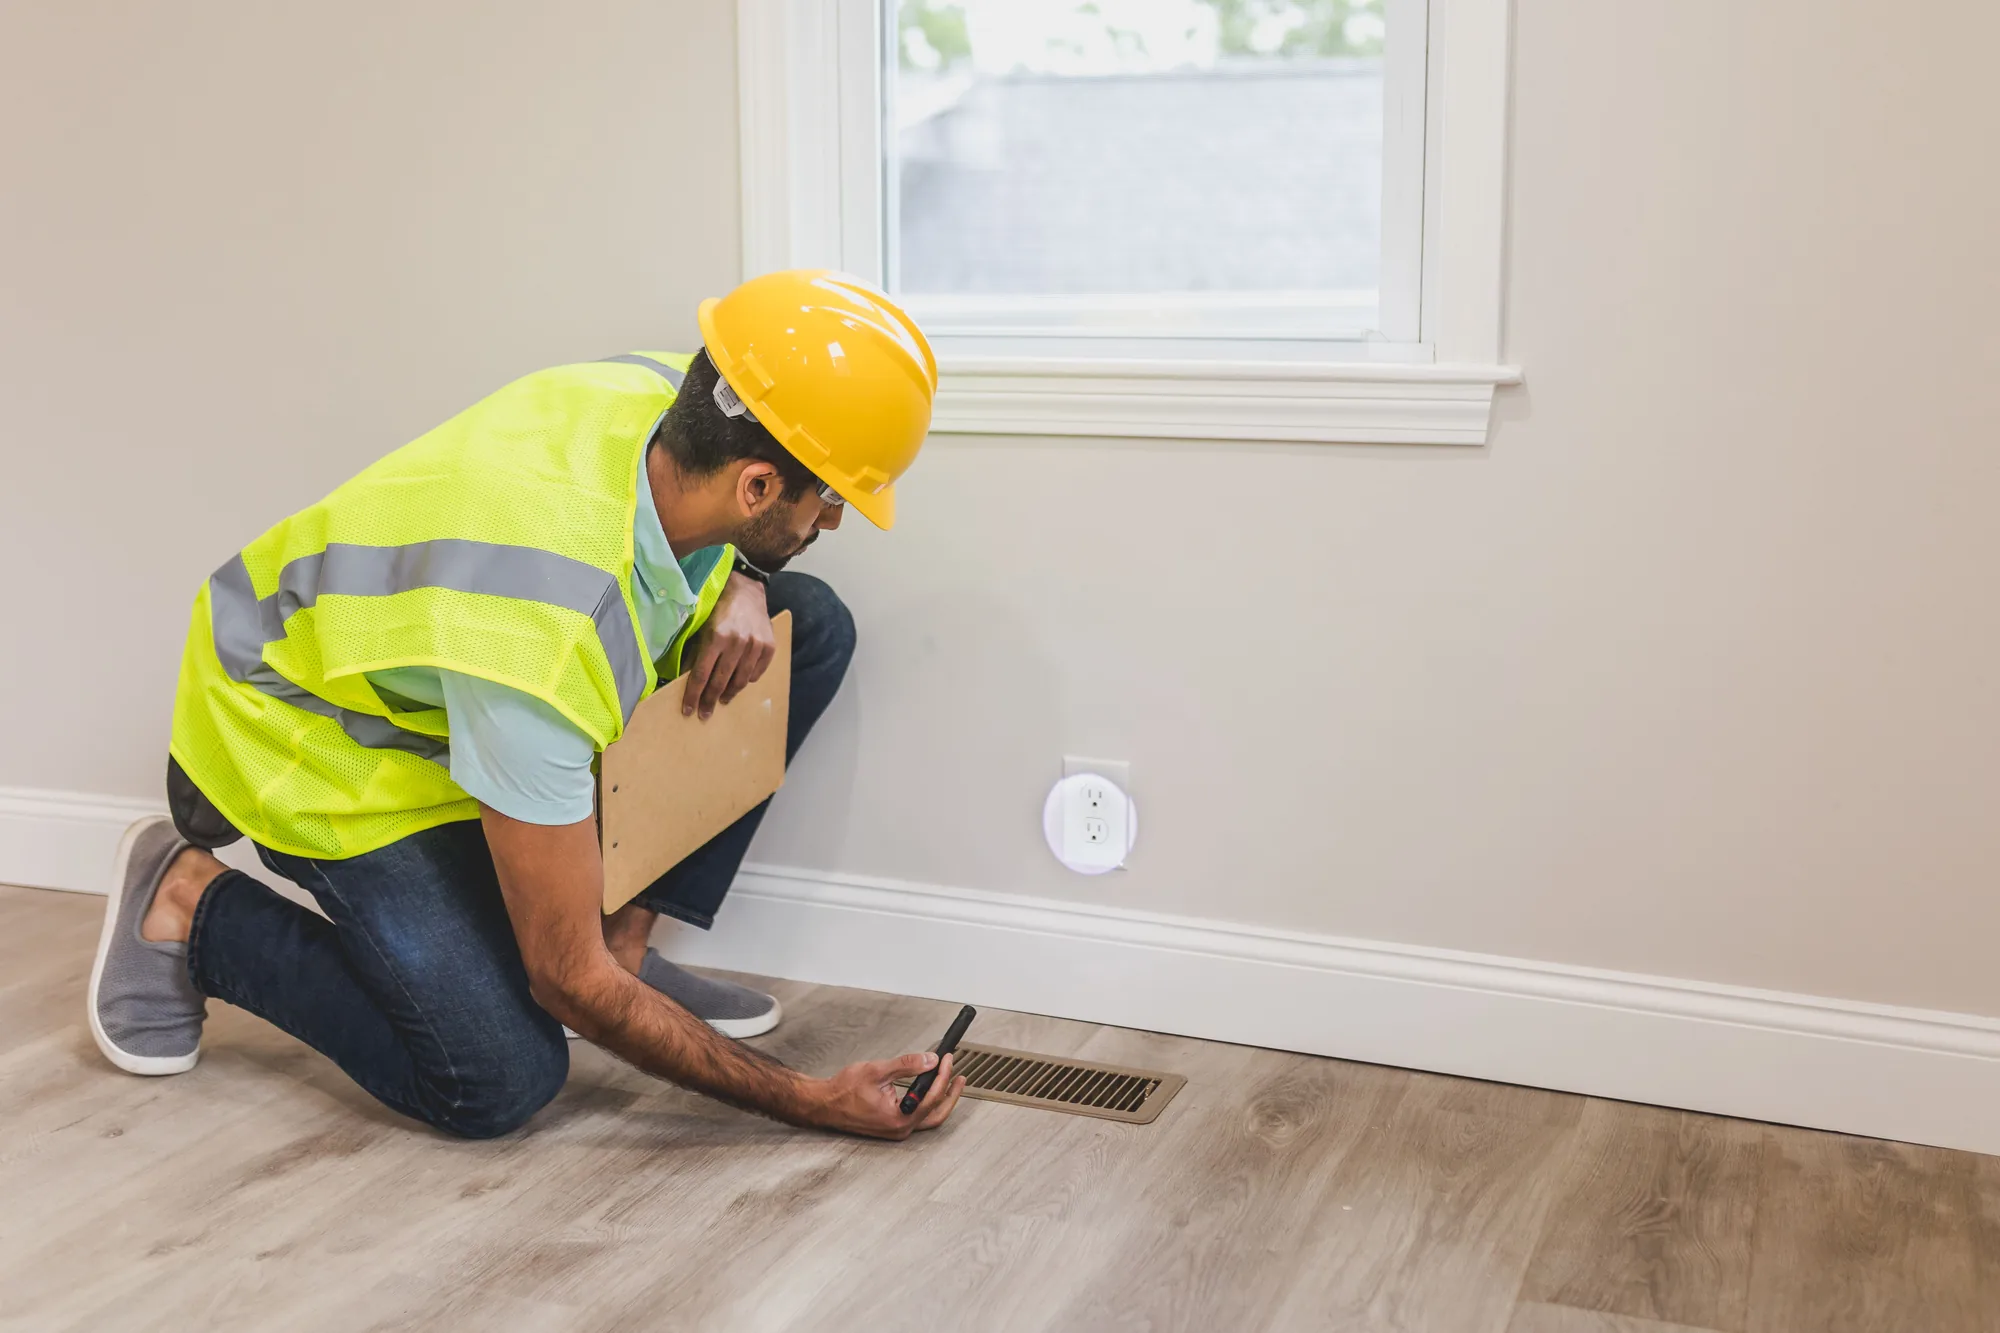
Mechanical systems commonly carry two-year protection under New York's tiered framework, but there is no reason to wait. Defects found at month eleven can be raised now alongside everything else.
Heating, cooling, and ventilation
- Uneven temperatures between rooms or floors, which can point to poorly balanced or undersized ductwork.
- Disconnected, crushed, or uninsulated ducts in attics, garages, or crawlspaces.
- Condensate lines that leak or drain improperly.
- Outdoor condensers that are not level or have damaged refrigerant line insulation.
- Registers that were never connected, weak return airflow, and the condition of filters.
- Venting for gas or oil appliances and operation of any fresh-air ventilation system.
Plumbing
- Active or past leaks under sinks, around toilets, at the water heater, and at the main shutoff.
- Water pressure, drainage speed, and fixtures that run, drip, or rock.
- The water heater's temperature and pressure relief discharge piping.
- Exterior faucets and whether freeze-resistant fittings were used where needed.
Electrical
- Ground-fault and arc-fault protection that does not test or reset properly.
- Dead outlets, reversed polarity, loose devices, and missing cover plates.
- Panel labeling, visible workmanship at the panel, and exterior outlet covers.
- Smoke and carbon monoxide alarm operation.
Inspectors evaluate systems visually and through normal operating controls. If something looks wrong, such as a furnace short-cycling or a duct run delivering almost no air, the report may recommend an HVAC contractor or electrician to diagnose it. That recommendation is itself useful evidence for your claim.
Interior Finishes, Windows, and Doors

Interior items are classic first-tier warranty claims, and they are the easiest to lose by waiting. Many builders handle cosmetic items once near the end of the first year, which makes a complete list at month eleven especially valuable.
Walls, ceilings, and trim
- Drywall nail or screw pops, lifted tape seams, and cracks at the corners of doors and windows.
- Gaps at baseboards, crown molding, and stair trim as framing shrinks.
- Paint defects the warranty addresses, such as obvious mismatches at repair areas.
Floors, tile, and cabinets
- Cracked tile or grout, especially at transitions and in bathrooms over framed floors.
- Gaps, cupping, or squeaks in hardwood and engineered flooring.
- Misaligned cabinet doors and drawers, and countertops separating from walls.
- Failed caulk around tubs, showers, and backsplashes.
Windows and exterior doors
- Windows that stick, will not lock, or show fogging between panes from failed seals.
- Water staining on sills or drywall below windows, which can signal flashing problems outside.
- Exterior doors that bind, show daylight around weatherstripping, or have loose hinges and thresholds.
Individually these look minor, but together they say something about installation quality. More importantly, a stain under a window or a door that suddenly binds can be the visible end of a larger problem in the wall or framing. The inspector's job is to record the symptom and, where appropriate, flag what it might indicate, so your claim addresses the cause and not just the cosmetic result.
How New York's First Winter Tests a New Home

Whether the house sits in a lake-effect snowbelt near Buffalo, Rochester, or Syracuse, in the Capital Region, in the Hudson Valley, or on coastal Long Island, its first heating season exposes weaknesses that a mild-weather closing never could. Every eleven-month window includes a full New York winter, which is a large part of why the timing works.
Freeze-thaw and frost
Repeated freezing and thawing moves soil, stoops, walkways, and poorly compacted backfill. Winter is often when shrinkage cracks widen, exterior steps separate from the house, and grading that looked fine in summer starts channeling meltwater toward the foundation.
Ice dams and attic moisture
Heavy icicles and ice ridges along the eaves usually point to heat escaping into the attic through gaps in insulation and air sealing, or to blocked ventilation. Ice dams can push meltwater under shingles and into walls and ceilings. An inspector who finds staining, frost on sheathing, or damp insulation can tie those findings back to construction details.
Wind-driven rain on the coast
Downstate and on Long Island, storms test window and door flashing, siding, and roof edges. Leaks that appear only during heavy wind-driven rain are worth reporting even if they are intermittent; record the date and conditions in your log.
Radon in new construction
Radon levels vary across New York, and a new house is not automatically low. If your builder installed a passive radon system, have it checked and test the home. Radon testing is a separate service from a home inspection, so ask whether it can be scheduled alongside. Our guide to radon testing in New York explains the process.
Keep notes through the cold months, including the dates of ice dams, drafts, or leaks, and give them to your inspector.
Your New Construction Warranty Timeline at a Glance
The most common way homeowners lose coverage is not a builder refusing a claim; it is a deadline passing unnoticed. The table below shows a practical new construction warranty timeline. Adjust it to the dates and terms in your own documents.
| When | What to do | Why it matters |
|---|---|---|
| At closing | Read the warranty, note its start date, and set reminders for month 9 and month 21. | Deadlines run from a defined date, not from when you notice a problem. |
| Months 1 to 9 | Keep a dated log with photos of every issue, plus maintenance records. | The log becomes the inspector's starting list and evidence for your claim. |
| Months 9 to 10 | Book an independent, licensed home inspector. | Spring and summer are busy; early booking protects your buffer. |
| Months 10 to 11 | Hold the inspection and receive the written report. | Leaves several weeks to prepare and send written notice. |
| Before month 12 | Send the written claim and confirm the builder received it. | Timely written notice preserves first-year rights. |
| Months 21 to 23 | Review plumbing, electrical, heating, cooling, and ventilation. | These systems commonly carry a two-year tier. |
| Before year 6 | Have any suspected structural movement evaluated. | Material structural defects commonly carry a six-year tier. |
If you bought a home that was already partway through its warranty term, such as a model home or a resale of a recently built house, find out the original start date and whether remaining coverage transfers to you. Some warranties transfer automatically, some require registration, and some do not transfer at all.
Choosing an Inspector, Cost Factors, and How to Prepare
Choosing the right inspector
- Confirm an active New York home inspector license with the Department of State. Licensees must show their license number on reports and advertising.
- Ask how many new-construction or warranty inspections they perform and whether they are familiar with builder performance standards.
- Ask whether every finding will be photographed and located, and how quickly the report is delivered.
- Ask about add-ons such as radon testing or infrared imaging, and who performs them.
What affects the cost
A builder warranty inspection is generally priced in line with a standard home inspection for a similar home, because the scope is similar. Fees vary with square footage, foundation type, travel distance, and add-ons. Rather than relying on an online average, request a free inspection quote for your property and deadline. The on-site portion for a typical single-family home usually takes a few hours.
How to prepare
- Gather the warranty booklet, final walkthrough list, prior service requests, and builder correspondence.
- Give the inspector your issue log with dates and photos.
- Clear access to the attic hatch, electrical panel, water heater, furnace, crawlspace, and garage walls.
- Make sure utilities are on and all systems are operating normally.
- Attend, at least for the summary at the end, so you understand each item before writing your claim.
Turning Your Report Into a Written Warranty Claim
A report only protects you if it reaches the builder in the right form and on time. Treat the claim as a formal document, not a casual email.
What a strong claim includes
- Your name, address, closing date, and lot or warranty number.
- A statement that you are submitting a warranty claim under your written warranty and any applicable statutory warranty, before the coverage period ends.
- A numbered list of defects, each with its location, a factual description, and a photo reference from the report.
- The inspection report as an attachment.
- A request that the builder inspect and schedule repairs.
Send it the way your warranty requires
Use the delivery method your warranty specifies, whether a portal, an email address, a form, or certified mail. When in doubt, use more than one method and keep proof of delivery. Save every reply, note the date and name for every call, and confirm verbal promises in writing.
Let the builder inspect before you repair
Most warranties give the builder a reasonable opportunity to inspect and repair. Making your own repairs first can give the builder grounds to deny the item. The exception is an emergency such as an active leak: limit the damage, document everything, and notify the builder immediately.
If the builder disputes the claim
Review the warranty's dispute resolution terms, which may require mediation or arbitration. For significant items, especially structural problems or water intrusion, a New York attorney experienced in construction matters can advise you. Your report, photos, and log will be central to that conversation. Our guide to reading a home inspection report can help you decide which findings to press hardest.
After the Repairs: Verification and the Two-Year Systems Tier
Getting repairs scheduled is half the job. The other half is confirming they actually fixed the problem.
Verify the work
- Walk through each completed item against your numbered claim list and sign off only on what is finished.
- For concealed work, such as a flashing correction or duct reconnection, ask what was done and request photos.
- Watch water-related repairs through the next heavy rain or thaw before considering them resolved.
- Consider a short re-inspection of significant or technical items.
Plan for year two
If your coverage follows the common tiered structure, installation defects in plumbing, electrical, heating, cooling, and ventilation may remain covered into the second year. A focused review around month 21 to 23 can catch recurring condensate leaks, failing fittings, or circuits that trip under real-life loads. Structural concerns should be evaluated as soon as they appear.
Townhouses and condominiums
In attached homes and low-rise condominiums, responsibility may be split among the builder, the homeowners association, and you. Roofs, siding, and common elements may be the association's to claim, while interior items are yours. Coordinate with the board so shared items are reported by the right party before the deadline.
Keep the file for resale
When you sell, buyers and their inspectors will ask about past defects and repairs. A tidy file showing the inspection, the claim, and the completed repairs demonstrates that the house was looked after responsibly.
How Inspecverse Can Help You Find a Local Warranty Inspector
Inspecverse is a free New York home inspection directory. We do not perform inspections and we do not employ inspectors. We make the first step simpler: you tell us about your home and your warranty deadline, and we route your request to a local NACHI-listed inspector who may contact you to discuss scheduling, scope, and pricing.
How it works
- Submit a short request through our quote form with your town or county, the home's size and type, and your warranty end date.
- Our team reviews each request manually and passes it to a local inspector in our directory who serves your area.
- If that inspector is available, they may reach out to you directly. Whether to hire them is your decision.
Before you hire anyone
- Confirm the inspector's active New York license with the Department of State. A directory listing or association membership is not a substitute.
- Say clearly that this is an 11-month warranty inspection and share your deadline.
- Ask what the fee includes, when the report will arrive, and whether radon testing is available.
Warranty deadlines pass quietly. If your first-year coverage ends within the next couple of months, request a free inspection quote now and give yourself time to inspect, document, and file a written claim. If you are still before closing on another new build, our guide to builder warranty vs independent inspection explains how to use both protections from the start.
Frequently Asked Questions
When should I schedule an 11-month warranty inspection?
Is an 11-month inspection worth it if my house seems fine?
Does New York have a law covering new home warranties?
Can I rely on the builder's own walkthrough instead?
How much does an 11-month warranty inspection cost?
What if the builder denies my warranty claim?
Next step
Ready to get a New York inspector on your property?
Inspecverse is a free referral directory. Send one short request and we will review it and route it to a local NACHI-listed inspector who serves your area. There is no cost and no obligation to hire.
-
1
Tell us about the property
Address area, property type, and the inspection you need.
-
2
We review your request
A person reads every request and picks a local NACHI-listed inspector.
-
3
The inspector may reach out
You discuss scope, timing, and price with them directly.
Inspecverse does not perform inspections, employ inspectors, or verify licenses. Before hiring, confirm the inspector holds an active New York home inspector license with the NYS Department of State.


